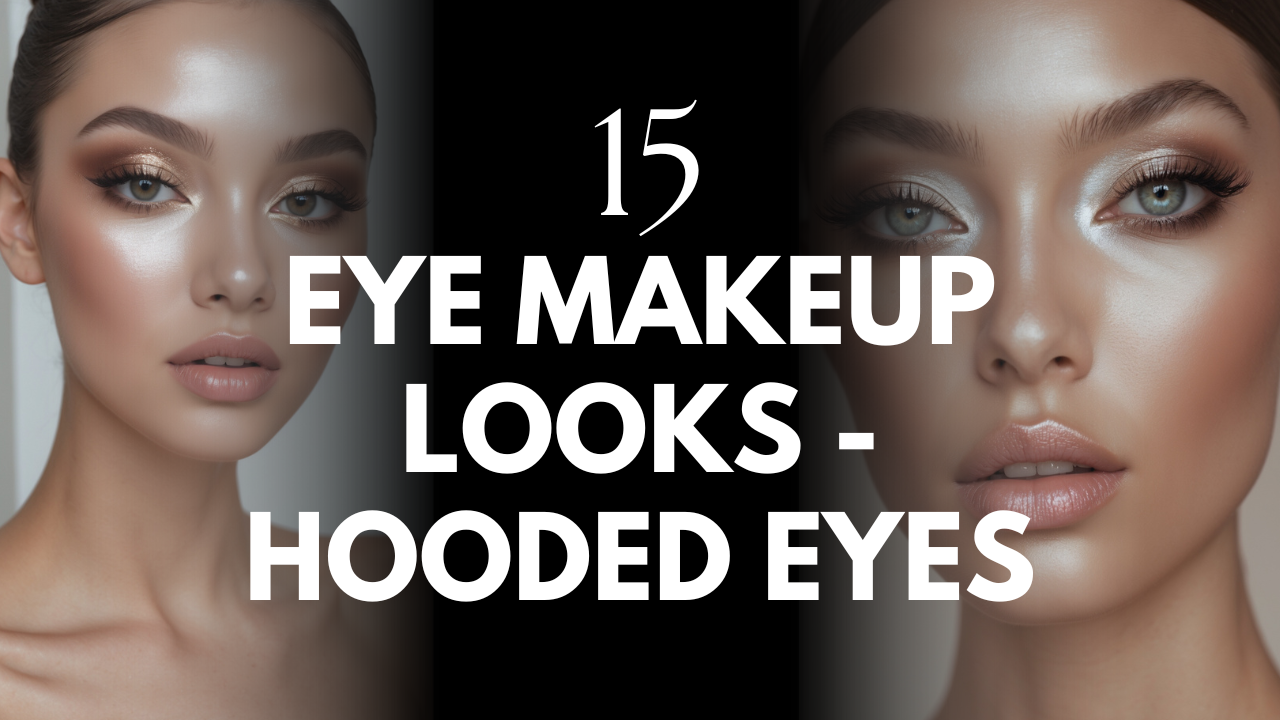
15 Stunning Eye Makeup Looks for Hooded Eyes: Expert Tips from a London Bridal Makeup Artist
Hello, gorgeous! I’m Shahena and if you’ve landed here because your eyeshadow keeps vanishing into thin air the moment you open your eyes, welcome to the club.
After 15 years as a bridal hair and makeup artist in London, specialising in South Asian bridal looks, I’ve seen every eye shape imaginable and hooded eyes? They’re absolutely stunning when you know how to work with them.
Let me be completely honest with you. When I first started doing makeup professionally, hooded eyes were my nemesis. I’d spend ages creating the perfect smoky eye, only for it to completely disappear the second my client opened their eyes. Cue internal screaming. But here’s the thing I’ve learned through countless weddings, pre-wedding events, and bridal trials: hooded eyes aren’t a problem to solve. They’re a beautiful feature that just needs the right approach.
Understanding Hooded Eyes: What Makes Them Special
Before we dive into the juicy stuff (the 15 gorgeous looks that’ll make your eyes pop), let’s talk about what hooded eyes actually are:
Hooded eyes have a less visible crease because the skin from the brow bone drapes down over the eyelid. Sometimes it’s subtle…sometimes more pronounced but the effect is the same: traditional eye makeup techniques don’t always translate.
The good news?
Celebrities like Jennifer Lawrence, Blake Lively and Emma Stone all have hooded eyes and they look absolutely phenomenal.
So if anyone’s ever made you feel like hooded eyes are somehow “less than” kindly show them the door. We don’t need that energy here.
Now…let’s get into the techniques that actually work. These are the same looks I create for my South Asian brides in London adapted for everyone who wants their eye makeup to look intentional not accidental.
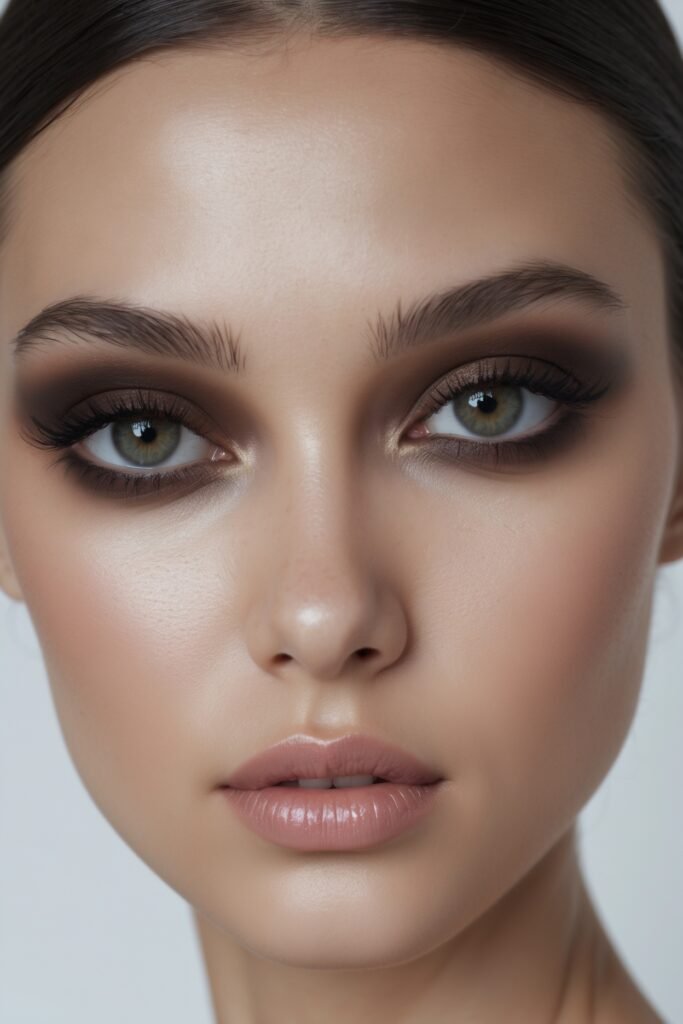
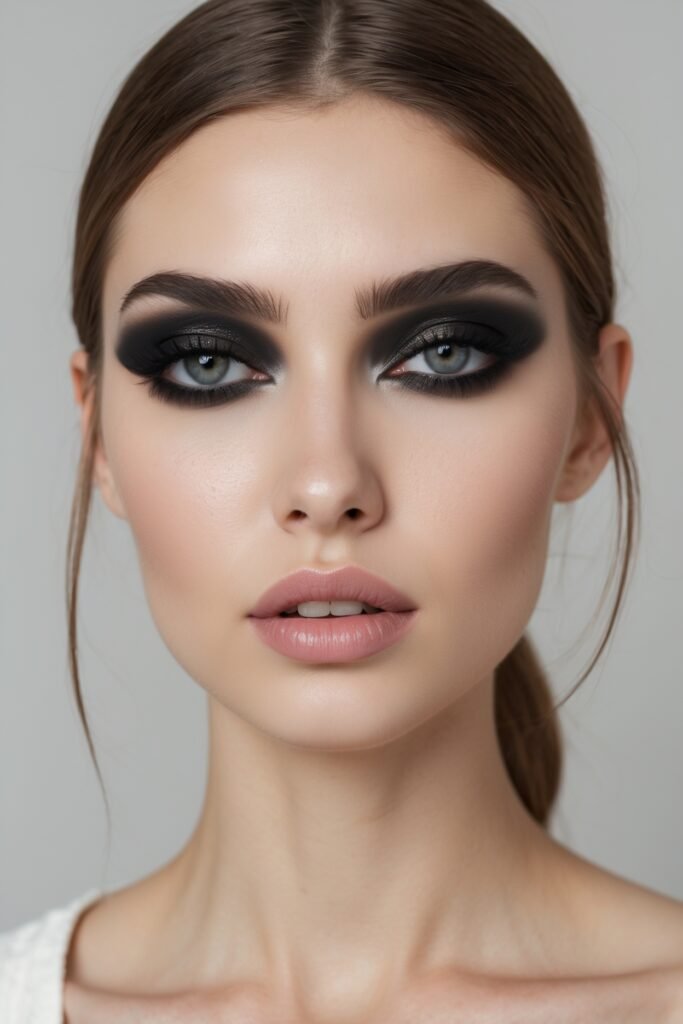
1. The Soft Smoky Eye: Your Foolproof Go To!
The smoky eye is a classic for good reason…it’s sultry, sophisticated and works for virtually any occasion. For hooded eyes, the key is taking that smokiness slightly above where your natural crease sits when your eyes are open.
Here’s how I do it:
Start with a matte transition shade (think soft brown or taupe) and blend it higher than you think you should.
I know it feels weird at first, trust me. When my clients see me applying eyeshadow with their eyes closed they always ask: “Isn’t that too high?” But when they open their eyes? Magic!
Keep the lid relatively lighter, focusing the deepest colour on the outer corner and blending it upward and outward. This creates depth without eating up your precious lid space. And please…I’m begging you…use matte shades for the crease work.
Shimmer in the crease can emphasise hooding which is the opposite of what we want.
Pro tip: Prime your lids properly. After 15 years of doing this, I can tell you that a good eyeshadow primer is worth its weight in gold for hooded eyes. It prevents that annoying creasing and keeps your gorgeous work in place all day (or night).

2. The Half-Cut Crease: Drama Without the Struggle
Full cut creases on hooded eyes?
That’s a one-way ticket to Frustrationville. But a half-cut crease? Now we’re talking.
This technique gives you that defined, editorial look without fighting against your eye shape.
The secret is carving out just the inner 2/3 of your lid with concealer, leaving the outer corner to blend seamlessly into your crease work.
Apply a shimmery shadow on that carved out space and suddenly you’ve got dimension and light exactly where you want it.
I use this technique constantly for my South Asian brides who want that Instagram worthy drama but need their makeup to last through a 12-hour wedding day. The concealer creates a barrier that keeps the shimmer exactly where you placed it…no migration, no muddy colours.
Pro tip: Use a flat, synthetic brush to apply your shimmer shade after you’ve carved out the space with concealer. Pat don’t swipe…for maximum impact and staying power.
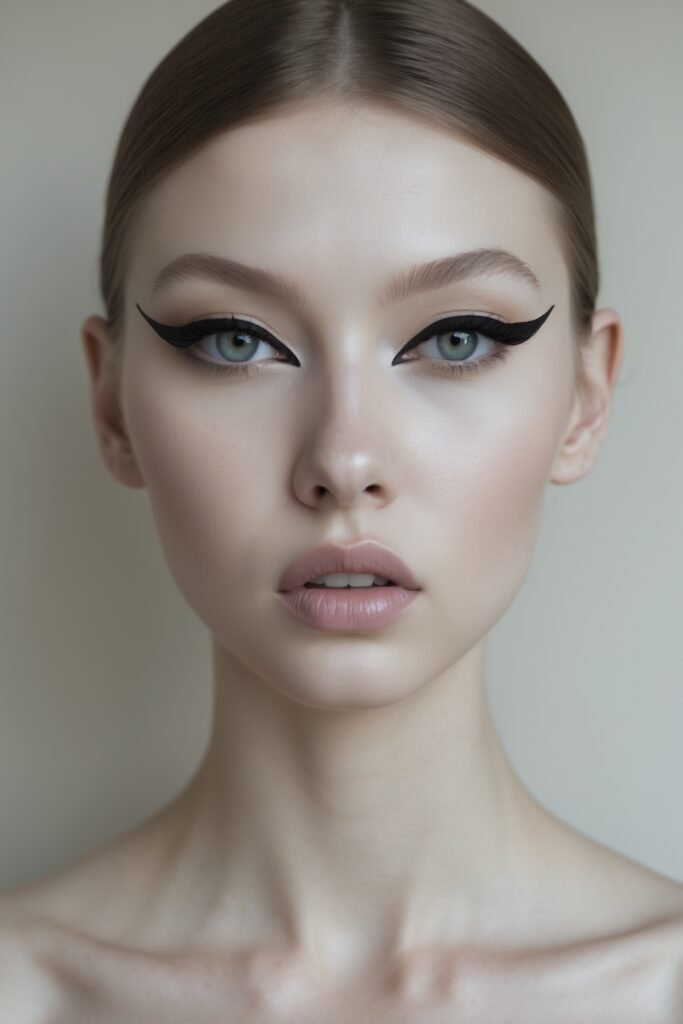
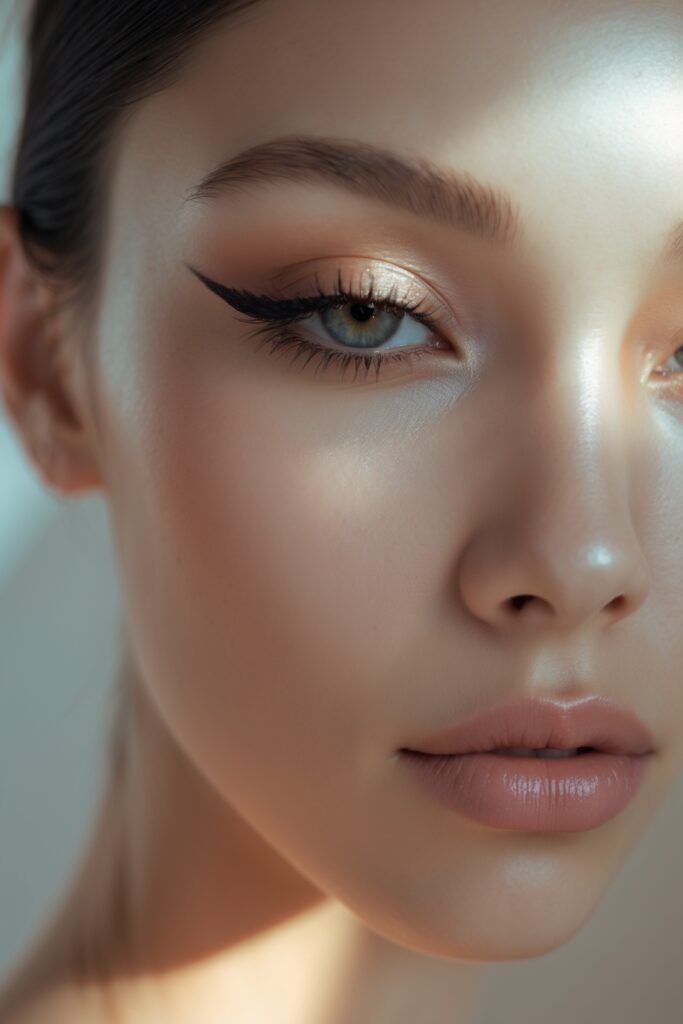
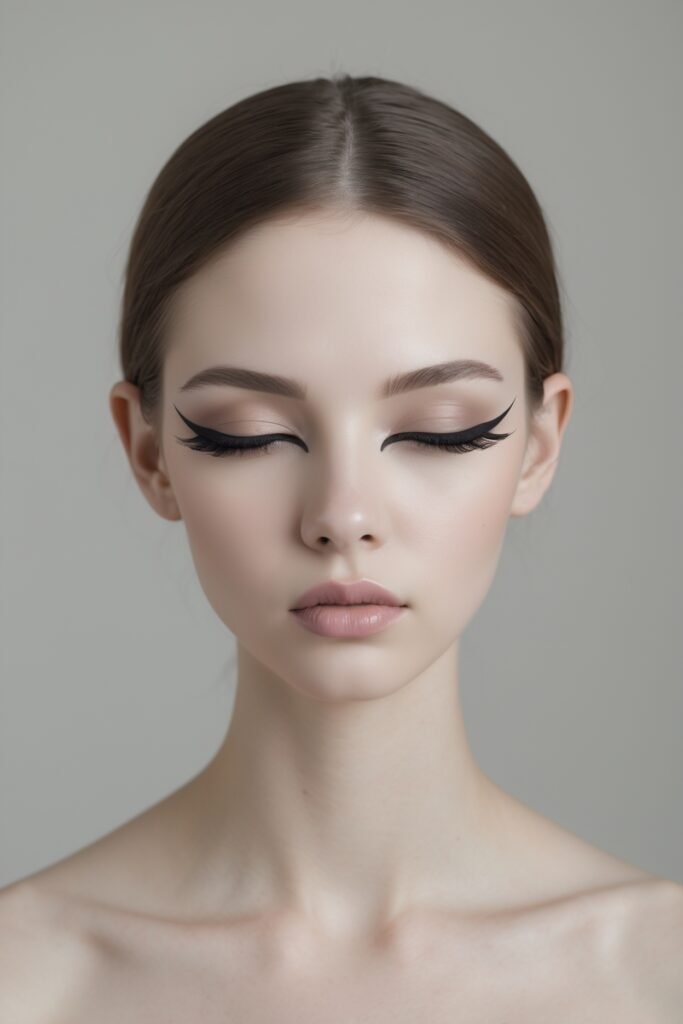
3. Winged Liner That Actually Works
Let’s address the elephant in the room:
Winged liner on hooded eyes can be… challenging. There, I said it.
You create this gorgeous wing and then you open your eyes and it’s pointing at the ceiling or has completely disappeared. Been there, done that, thrown the eyeliner across the room in frustration!
The solution?
Draw your wing with your eyes OPEN. I know this sounds counterintuitive but hear me out. When your eyes are open, you can see exactly where that flick needs to go to follow your natural eye shape. Keep the liner thin on the inner corner and create your flick at the outer corner, angling it upward rather than extending it outward.
For hooded eyes, the connection point between your liner and your flick is crucial. Instead of a smooth, continuous line, you might need to create what I call a “broken wing”…a slight lift in the liner at the outer corner that gives the illusion of lift without getting lost in the hood.
Pro tip: A gel liner or a felt tip pen works better than traditional liquid liner for hooded eyes. You need more control to draw with your eyes open and these formulas give you that precision without tugging on delicate lid skin.
4. The Invisible Liner: Subtle Enhancement
Not every day calls for a dramatic wing.
Sometimes you want that “your lashes but better” effect and that’s where invisible liner comes in. This technique involves tight lining…drawing liner along your upper waterline and between your lashes at the lash root.
The result?
Fuller looking lashes without any visible liner. It’s perfect for brides who want natural looking makeup or for everyday wear when you want to look polished without looking “done up.”
I use this technique for about 70% of my South Asian brides during the morning ceremony when they want something softer before the evening reception drama. It defines the eyes without competing with intricate jewelery or heavily embellished outfits.
Pro tip: Invest in a waterproof gel pencil for tight lining. Regular liners will transfer onto your lower waterline or fade within hours and please, sharpen that pencil…a blunt liner is nobody’s friend.
5. Glossy Lids: The Modern Minimalist
If you haven’t tried the glossy lid trend yet you’re missing out.
This look is fresh, modern and incredibly flattering on hooded eyes because it plays with light rather than fighting for visible lid space.
Start with a neutral eyeshadow base…a soft taupe or warm brown works beautifully and then add a dab of clear or tinted eye gloss to the centre of the lid. The glossy finish catches the light and makes your eyes look bright and awake without any complicated blending.
Just make sure you’re using an actual eye gloss, not regular lip gloss. Eye glosses are formulated to be non sticky and less likely to crease, which is essential for hooded eyes where the skin is constantly moving.
Pro tip: A little goes a very long way. Start with a tiny amount and build up if needed. Too much gloss will slide around and create more creasing than you’d like.
6. Inner Corner Highlight: Instant Brightness
This is probably the easiest technique in my entire arsenal and it delivers maximum impact with minimum effort.
A small touch of highlighter or shimmery shadow in the inner corner of your eye creates an instant brightening effect that opens up the entire eye area.
I use this technique on literally every bride I work with regardless of eye shape. It’s that good.
For hooded eyes, it’s especially effective because it draws attention to an area that isn’t affected by the hood at all.
Choose a champagne, pale gold or icy pink shade depending on your skin tone and the overall look you’re going for. Warm toned highlighters work beautifully with South Asian skin tones while cooler tones can create a striking effect for evening looks.
Pro tip: Apply your inner corner highlight after you’ve finished the rest of your eye makeup. This way, you can assess exactly how much brightness you need to balance the look. Sometimes just a dot is enough…other times you might want to extend it slightly along the inner lid.
7. Reverse Cat Eye: Sultry and Unexpected
Why should the upper lash line get all the fun?
The reverse cat eye focuses the liner on the lower lash line, creating a sultry, editorial effect that works brilliantly on hooded eyes because it completely sidesteps the hood issue.
Start by lining your lower lash line with a kohl pencil, then smudge it out slightly with a small brush. Extend the line past the outer corner angling it downward slightly to create that “reverse wing” effect. Keep the upper lash line bare or just tight lined for maximum impact.
This look is perfect for evening events when you want something a bit different. I’ve used it for South Asian Mehndi functions and sangeet nights when my brides want something trendy and youthful.
Pro tip: Set the kohl liner with a matching eyeshadow shade to prevent smudging throughout the day. There’s nothing worse than checking your reflection and discovering you’ve got panda eyes.
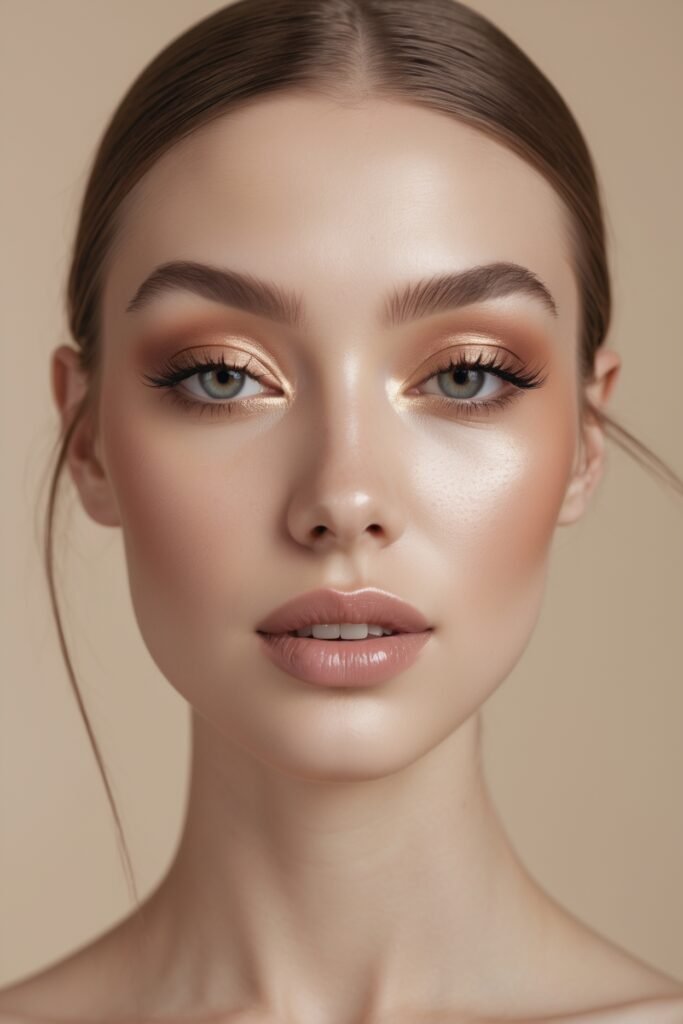
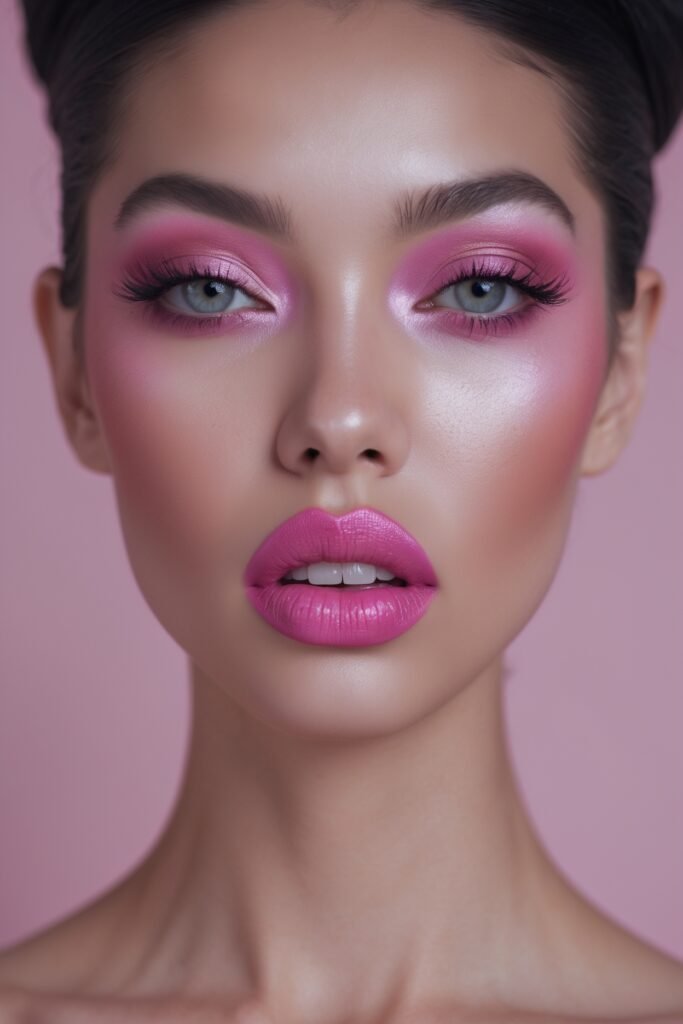
8. Monochrome Magic: Effortlessly Coordinated
There’s something so elegant about a monochromatic makeup look…using the same shade family on your eyes, cheeks and lips creates a cohesive, pulled together appearance without looking overdone.
For hooded eyes, this approach is particularly clever because it draws the focus to your overall face rather than putting all the emphasis on eye makeup that might be partially obscured.
A peachy pink, warm terracotta or soft mauve works beautifully especially for bridal looks.
I often use this technique for South Asian brides during their civil ceremony or registry office wedding when they want something romantic and soft. It photographs beautifully and has a timeless quality that won’t look dated in years to come.
Pro tip: Vary the intensity rather than using the exact same product everywhere. Use a more pigmented version on the lips, a softer wash on the eyes and a diffused application on the cheeks. This creates depth while maintaining the cohesive color story.
9. Floating Liner: Graphic and Bold
If you’re feeling adventurous, the floating liner is where it’s at.
This technique involves drawing a graphic liner shape above your natural crease line, essentially creating a new “crease” that’s visible regardless of your eye shape.
I won’t lie…this look takes practice. But once you get it, it’s absolutely show stopping. Use a fine brush and a gel liner or liquid liner with a precise applicator. Draw your line where you want it to sit when your eyes are open, keeping the shape relatively symmetrical on both eyes.
This is one of my favourite looks for fashion forward brides or for pre–wedding events like engagement parties where you can be a bit more experimental with your makeup.
Pro tip: Draw the floating liner with your eyes open, marking small points along where you want the line to go. Then close your eyes and connect the dots. This prevents the wonky lines that happen when you try to draw the entire thing with eyes closed.
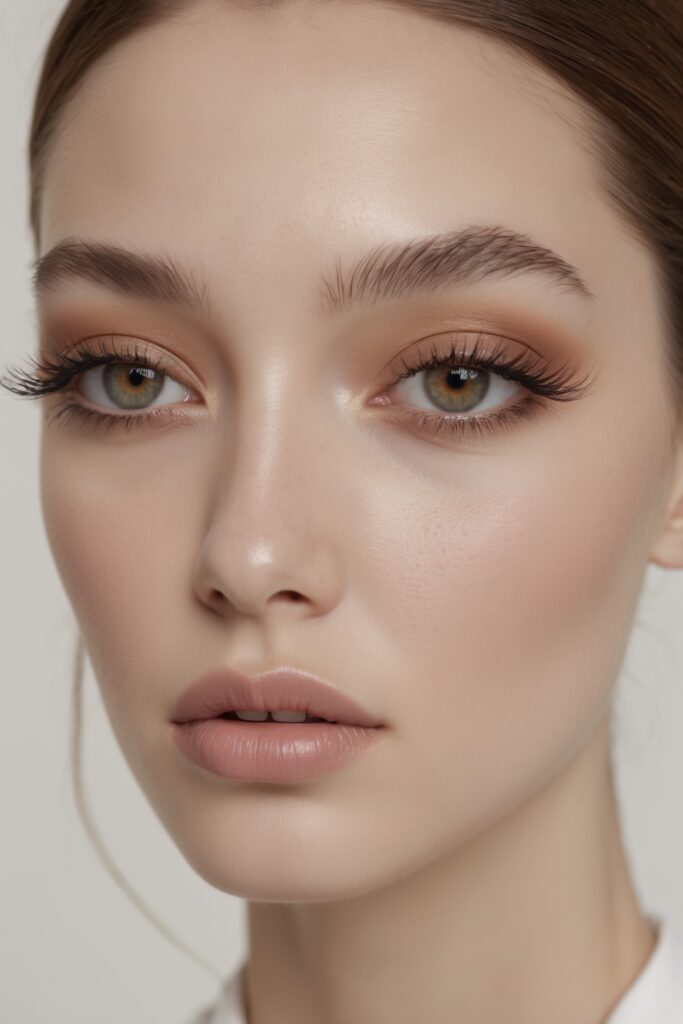
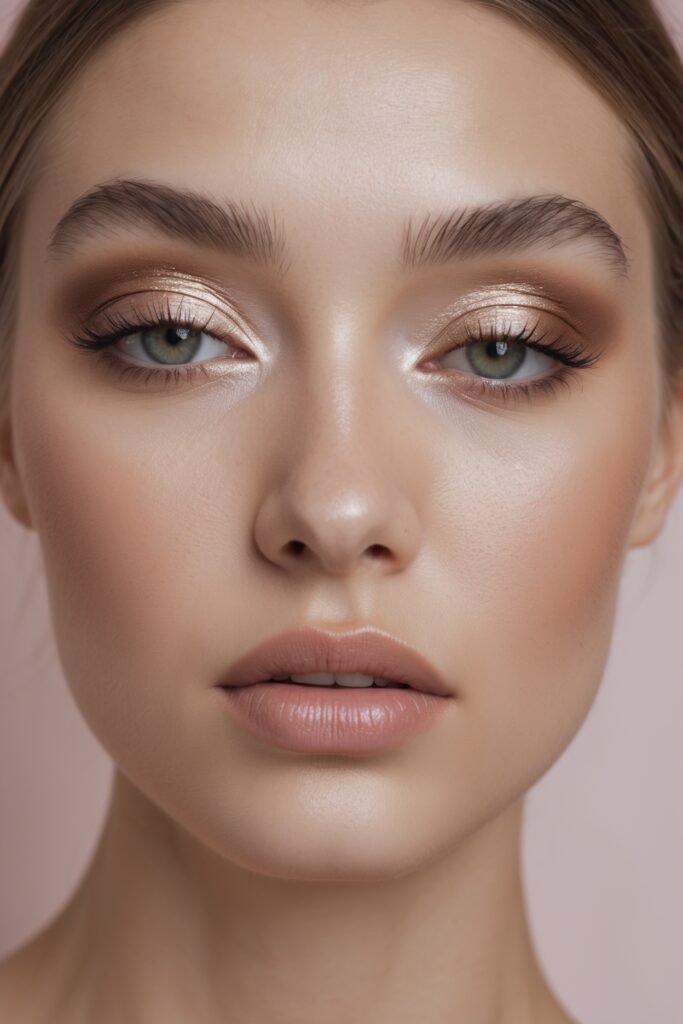
10. The ‘No Makeup’ Makeup: Polished and Natural
Not every occasion calls for bold dramatic eye makeup. Sometimes you want to look like yourself, just slightly more polished.
The “no makeup” makeup look is perfect for daytime events, professional settings or when you want to let other elements of your look (like a bold lip or statement jewelery) take centre stage.
For hooded eyes, keep it simple…a wash of soft brown shadow, plenty of mascara and a nude liner in the waterline to brighten the eyes. Curl your lashes beforehand: this makes such a difference in opening up hooded eyes and making them appear more awake.
I use this approach for morning wedding ceremonies, particularly for bridesmaids or mothers of the bride who want to look beautiful but not overly made up.
Pro tip: The “no makeup” makeup look actually requires quite a bit of skill to look truly effortless. Blend everything seamlessly, and make sure your base is flawless so your eyes don’t have to do all the heavy lifting.
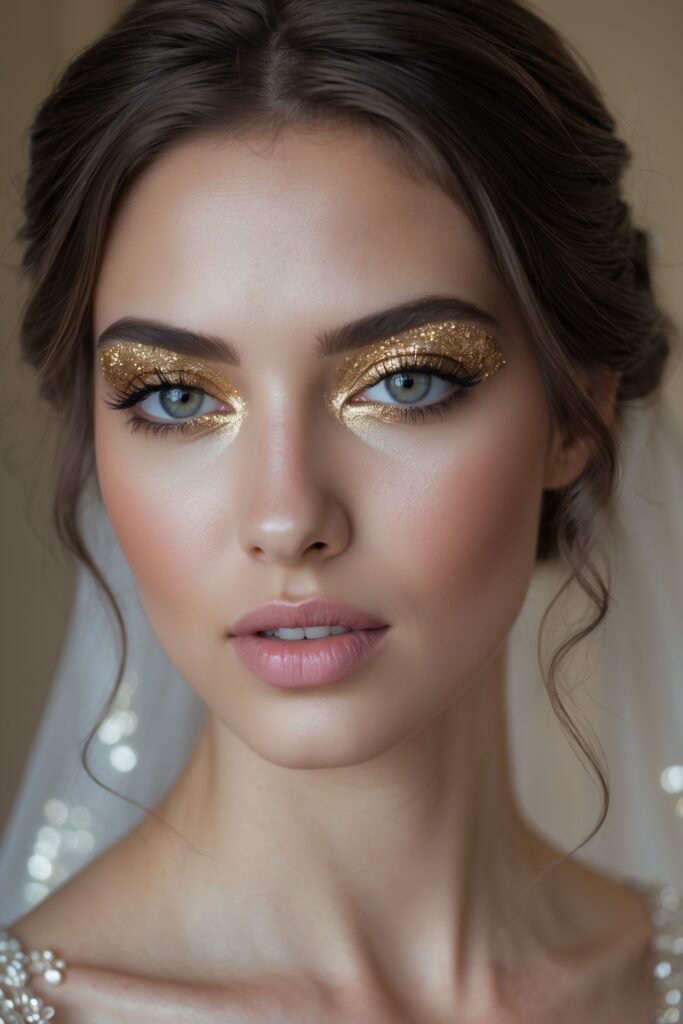
11. Glitter Glam: Sparkle and Shine
Listen…I’m South Asian and we don’t do anything by halves when it comes to weddings. Glitter is always welcome at our celebrations and eye glitter can look absolutely stunning on hooded eyes when applied correctly.
The key is using an actual glitter glue or primer specifically designed for loose glitter. This keeps those sparkles exactly where you put them instead of creating a glittery crime scene all over your cheeks (ask me how I know).
Apply your base eyeshadow look first, then use a flat brush or your fingertip to pat glitter onto the centre of the lid. For hooded eyes, keep the glitter on the visible part of the lid when your eyes are open…there’s no point putting it where nobody can see it.
Pro tip: Always prep your client or prep yourself by placing a tissue or piece of tape under the eye to catch glitter fallout during application. Remove it before you do your undereye concealer and you’ll have a clean canvas to work with.
12. Smudged Kohl: Effortlessly Sexy
There’s something undeniably alluring about softly smudged kohl liner.
It’s that “I woke up like this” vibe (except actually achievable). This look works beautifully on hooded eyes because the smudging creates soft definition without requiring precise placement.
Line both upper and lower lash lines with a soft kohl pencil, then use a small smudging brush to soften the lines. You want it to look intentionally undone, not messy so keep the smudging controlled.
This is perfect for evening events, date nights or any time you want to channel a bit of that sultry, mysterious energy. I often use this technique for South Asian Walima receptions when brides want something softer after the intensity of the main wedding ceremony.
Pro tip: Set the smudged liner with a matching eyeshadow shade. This locks the product in place while maintaining that soft, diffused effect. Otherwise you risk it migrating into your crease by midday.
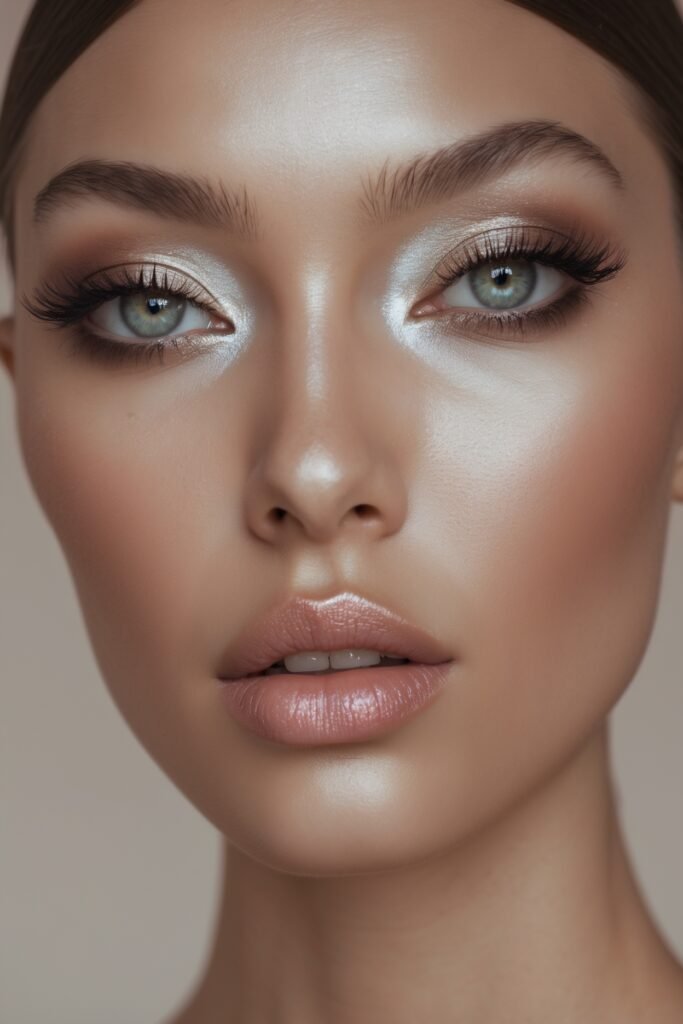
13. The Halo Eye: Maximum Dimension
The halo eye technique places a light, shimmery shade in the center of the lid, surrounded by darker shades on the inner and outer corners. This creates a multidimensional effect that makes hooded eyes appear larger and more prominent.
For the best results…use a damp brush to apply your centre shimmer shade…this intensifies the pigment and helps it adhere better. The contrast between the light centre and darker edges creates the illusion of depth, which is exactly what we want for hooded eyes.
I love this technique for evening weddings and receptions. It’s dramatic enough to hold up in photography but wearable enough that it doesn’t look costume-y in person.
Pro tip: Choose your centre shimmer shade carefully. Pale champagne or silver can look stunning but on deeper skin tones (like many of my South Asian brides), a warm gold or rose gold often photographs better and looks more cohesive with warm toned bridal jewellery.

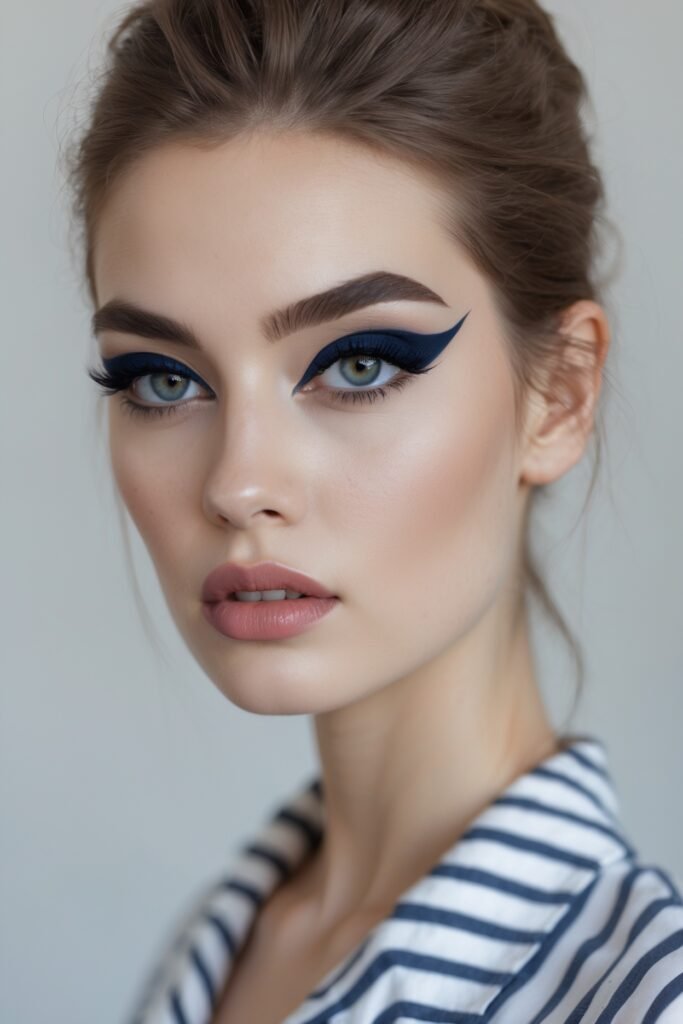
14. Colorful Wings: Unexpected Pop
Who made the rule that winged liner has to be black? Spoiler alert: nobody. Coloured liner in shades like navy blue, emerald green, burgundy or even metallics…adds an unexpected pop of colour that looks fresh and modern.
For hooded eyes, coloured liner can actually be more forgiving than black because it’s less stark and harsh. Navy in particular is incredibly flattering on virtually every skin tone and eye colour.
Apply coloured liner the same way you would black liner, using the techniques I mentioned earlier (drawing with eyes open, creating the flick first, etc.)…You can go bold and make the liner the star of the show or keep it subtle by smudging it out slightly.
Pro tip: Set your coloured liner with a matching eyeshadow shade. This intensifies the colour, prevents smudging and makes the liner last significantly longer. I always do this for brides because their makeup needs to survive happy tears, multiple outfit changes and hours of celebration.
15. Softly Defined Crease: Everyday Elegance
Sometimes the most beautiful makeup is the most understated. A softly defined crease…using matte shadows to create gentle depth and dimension is perfect for everyday wear or for occasions when you want to look polished but not “done up.”
This technique is all about blending.
Choose a transition shade that’s one or two shades deeper than your skin tone and blend it into and slightly above your natural crease. Add a slightly deeper shade to the outer corner blending it carefully to create a soft gradient effect.
I teach this technique to many of my brides because it’s something they can easily recreate themselves for everyday wear after the wedding. It’s foolproof, elegant and works for virtually any occasion.
Pro tip: Use a fluffy blending brush and work in small circular motions to diffuse any harsh lines. The key to this look is seamless blending…you shouldn’t be able to see where one shade ends and another begins.
Final Thoughts: Embrace Your Beautiful Hooded Eyes
After 15 years of working with brides of all backgrounds and eye shapes I can tell you with absolute certainty: hooded eyes are not a limitation. They’re simply a different canvas that requires different techniques.
The looks I’ve shared with you today are the same ones I use for my South Asian brides here in London adapted for anyone who wants to make their eye makeup work with their eye shape not against it.
Whether you’re preparing for your wedding day, a special event or just want to elevate your everyday makeup game, these techniques will serve you well.
Remember, makeup should be fun.
Yes, it takes practice to master these techniques (I’ve been doing this professionally for 15 years and I’m still learning) but that’s part of the joy. Don’t be afraid to experiment, try new things and find what works best for your unique eyes.
Now go forth and create some gorgeous eye makeup! Your hooded eyes are about to become your favourite feature.
Love
Shahena x
Which of these 15 looks are you most excited to try? Let me know in the comments below—I love hearing from you all!