15 Valentines Nail Art Designs
So Valentine’s Day nails…after 16 years as a professional beauty artist, I’ve done every possible variation of hearts, reds and pinks you can imagine.
And you know what?
Most of them were way more complicated than they needed to be.
So here’s 15 Valentine’s nail ideas that range from “I’ve got 5 minutes before the school run” to “I’m feeling fancy and have time to spare.”
All tested by me, all actually doable, and most importantly…all suited to different lifestyles, budgets and skill levels.
Because let’s be honest…not everyone has steady hands, a professional nail lamp or the patience to sit still for an hour painting tiny hearts.
Some of us are just trying to look vaguely put together while juggling four kids, a business and remembering to eat lunch.
Quick Background: Why You Should Listen to Me
I spent over 16 years in the beauty industry, specialising in South Asian bridal looks. If you know desi weddings, you know the nails have to be absolutely perfect…like aunties-will-talk-about-it-for-years perfect.
The “I’ve Got 10 Minutes” Looks
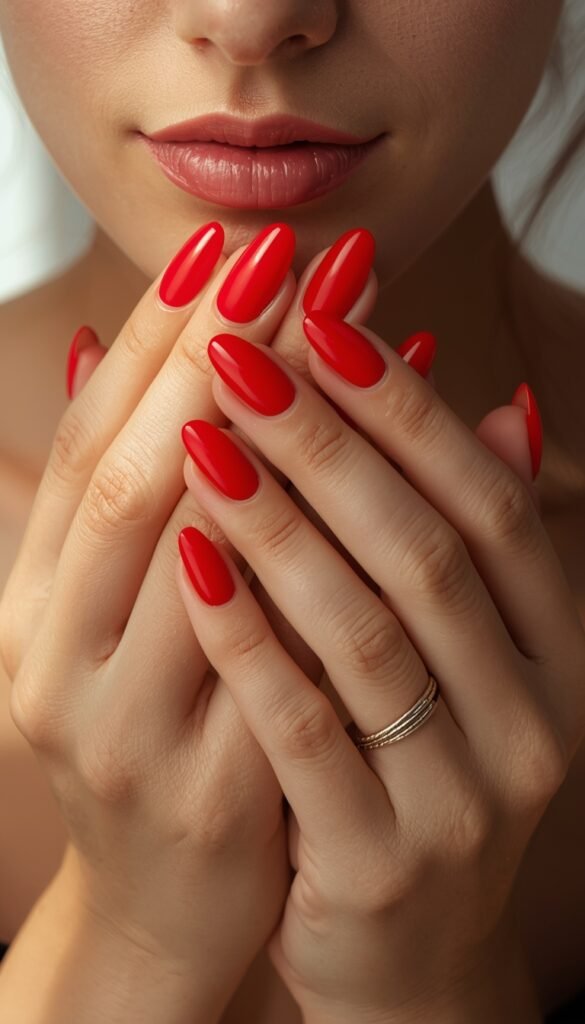
Classic Red
This is my go to when I need to look put together but I’m rushing.
What you need:
What you need:
How to do it:
Paint two thin coats of red.
Let them dry properly (I know… but trust me).
Top coat everything.
Mum reality check: This survived washing up (without gloves, I was lazy), making dinner and bedtime with my 5 year old. Lasted about 5 days before chipping.
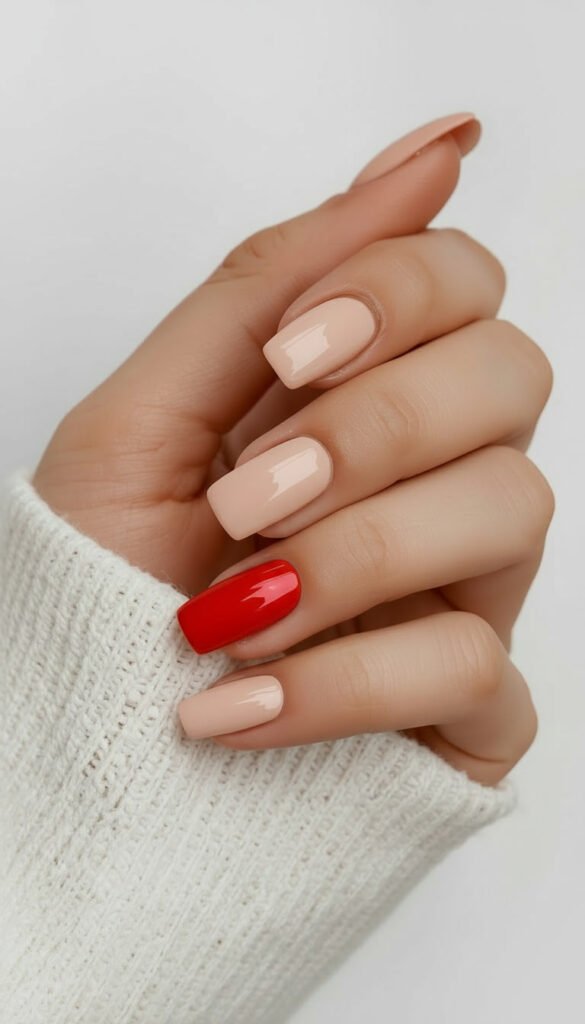
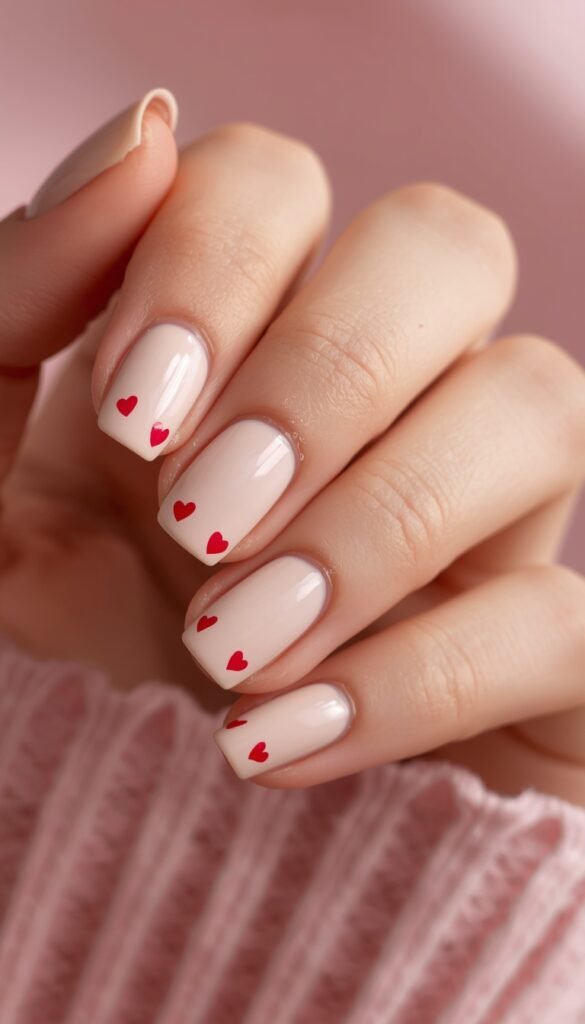
Nude Nails with One Red Accent
For when you want subtle but still Valentine’s-appropriate.
What you need:
- Sally Hansen – 20 Almond Milk
- Red Essie Nail Enamel – Not Red-y For Bed
- Seche Vive Dry Fast Top Coat (No UV Lamp Required)
How to do it:
Paint all nails nude except your ring finger…make that one red.
Two coats of each, top coat and done. It’s simple but the pop of red makes it feel special.
I wore this to my 18 year old’s birthday dinner. Nobody specifically mentioned my nails which means they looked natural and polished exactly what you want.
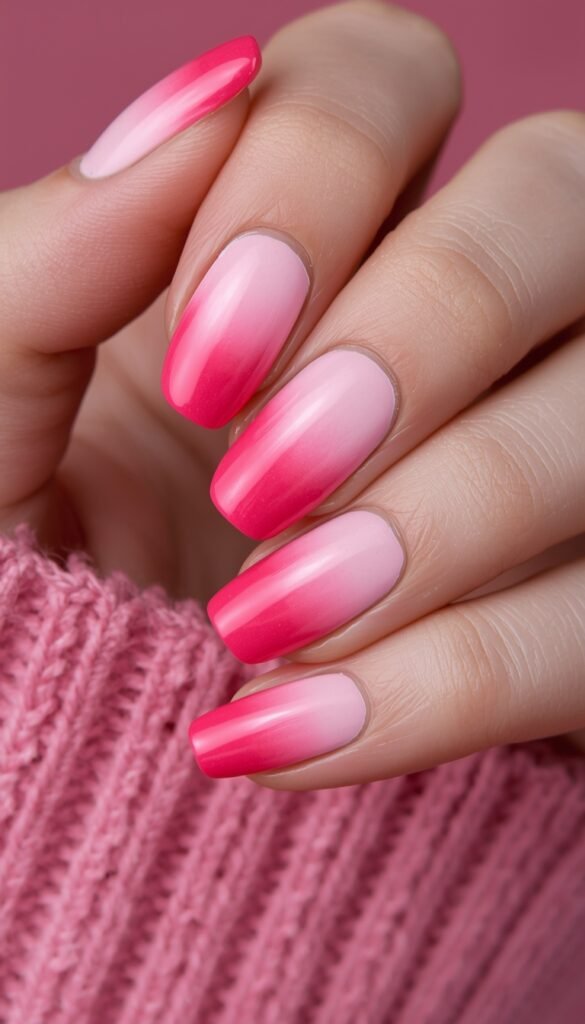
Pink Ombré (The Easy Way)
Ombré sounds fancy but it’s actually dead simple if you cheat a bit.
What you need:
- OPI Nail Polish – Rosy Future
- Essie Nail Polish Hot Pink – Vibrant Magenta
- Makeup Sponges (Wedge Style)
- Nail Polish Remover (Acetone-Free)
- Cotton Buds/Q-tips (Large Pack)
- Seche Vive Top Coat
How to do it:
Paint your nails with the light pink as a base.
While it’s still slightly wet, dab the hot pink onto the tips with a makeup sponge. Blend where they meet by dabbing gently.
Yes, it gets messy that’s what cotton buds and nail polish remover are for.
Seal with top coat.
I did this with my 16 year old daughter for her birthday. We made a proper mess of the kitchen table but we laughed loads and ended up with gorgeous nails.
She still asks me to do her nails sometimes which at 16 is basically a miracle.
Press On Nails (Hear Me Out) Also for my Muslim girlies!
I was a snob about press ons for years. Then I tried the new ones and honestly? Game changer.
What you need:
- Kiss Salon Acrylic French Nails (Various Valentine’s styles)
- Elegant Touch Pre-Glued False Nails
- Static Nails Reusable Pop-On Manicure
- Professional Nail Glue (Strong Hold)
- Nail File & Buffer Set
How to do it:
File your natural nails short, push back cuticles, wipe nails with alcohol or hand sanitiser.
Apply glue to both your nail and the press on.
Press down for 30 seconds minimum (feels like forever, but do it). Don’t get them wet for two hours.
Last week I did this before meeting my mates for lunch. Nobody could tell they weren’t professionally done, they lasted almost a week and I applied them while watching Love Island.
Perfect.
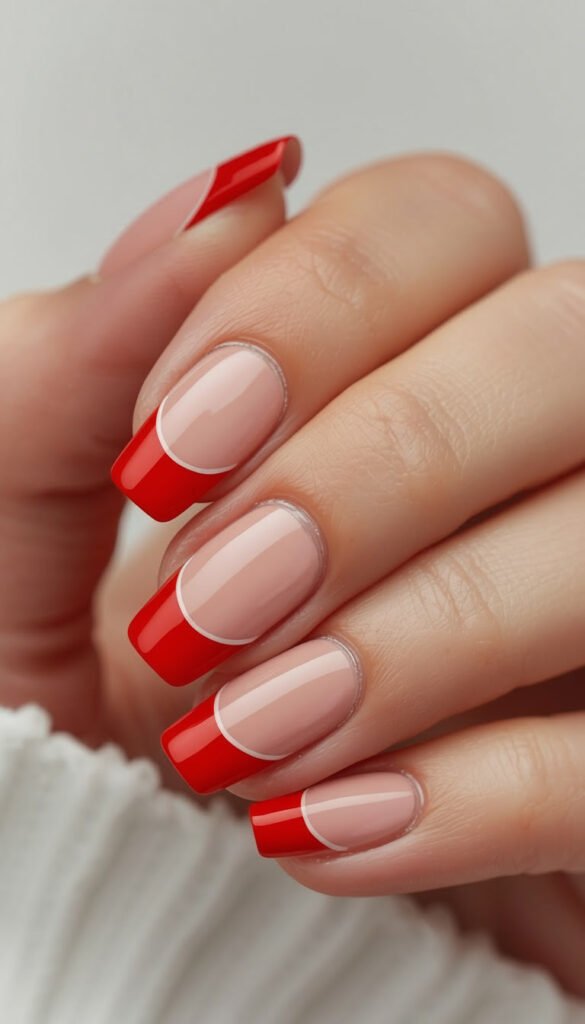
5. Red Tips (French Manicure Style)
The French manicure’s cooler cousin.
What you need:
- Essie Nail Polish Nude/Pale Pink)
- Rimmel Super Gel in (Red)
- French Manicure Guide Stickers (Multiple sizes)
- Seche Vite Top Coat
How to do it:
Paint your nails with the nude base and let dry completely.
Paint just the tips red…either freehand if you’re brave or use guide stickers if you’re sensible.
I always use the stickers because who has time for wonky tips?
This looks really elegant and modern.
I wore this style to a family wedding last year and got loads of compliments. The red tips photograph beautifully too, if you’re into that sort of thing.
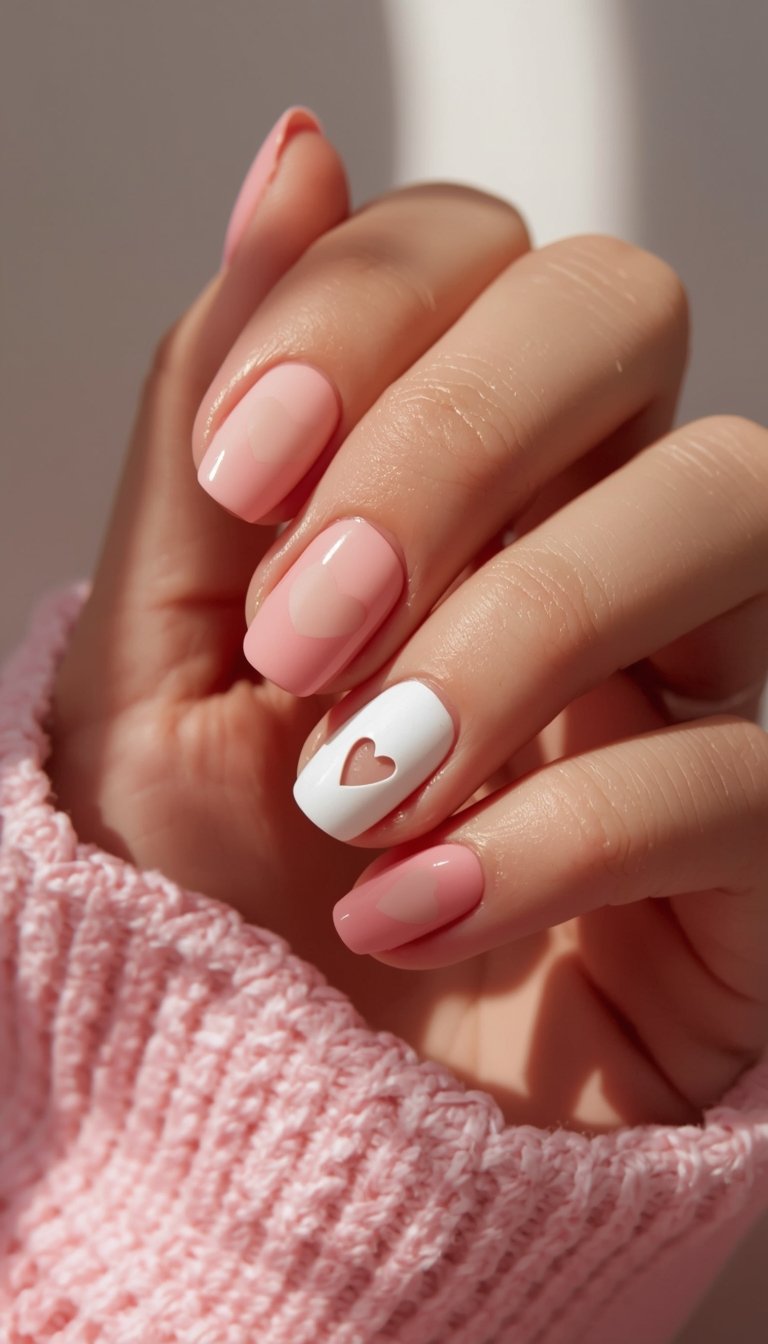
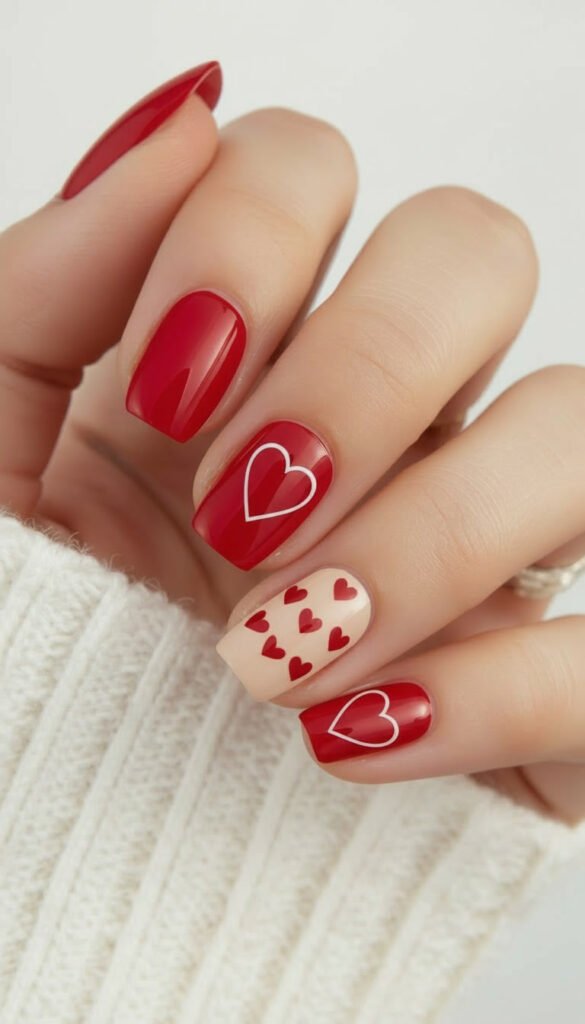
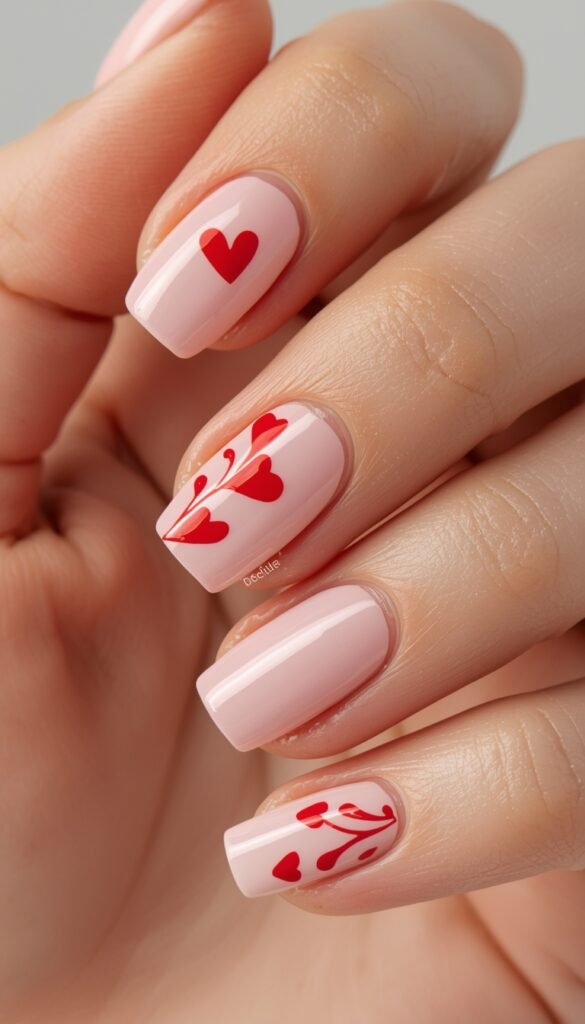
Heart French Tips
Like regular French tips but make it Valentine’s.
What you need:
- Essie Gel Couture (Nude)
- Sally Hansen Red
- Nail Art Brushes Set (7 pieces, thin detail brushes)
- Nail Dotting Tools Set
- Seche Vite Top Coat
How to do it:
Paint your nails with a nude base.
Once completely dry, paint tiny hearts on the tips of each nail. I use a thin nail art brush but honestly, a toothpick dipped in polish works fine.
They don’t have to be perfect…wobbly hearts look quite cute and handmade.
The trick is to make the hearts small. Massive hearts on your nail tips look a bit naff. Tiny ones look delicate and sweet.
My biggest mistake with this:
Trying to do hearts before the base was completely dry. I dragged the base coat and ended up with a smudgy mess.
Learn from my impatience…wait for it to dry properly.
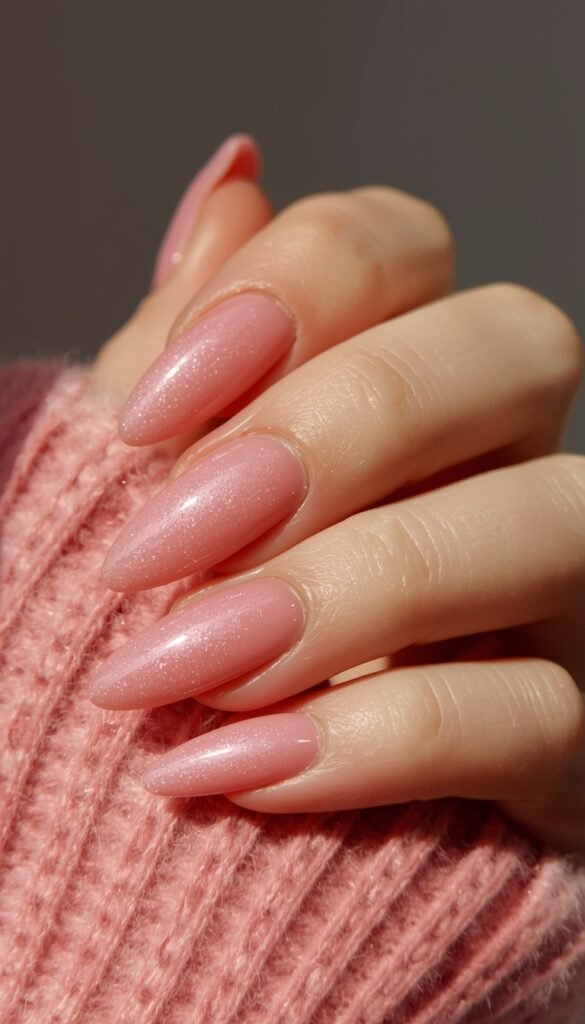
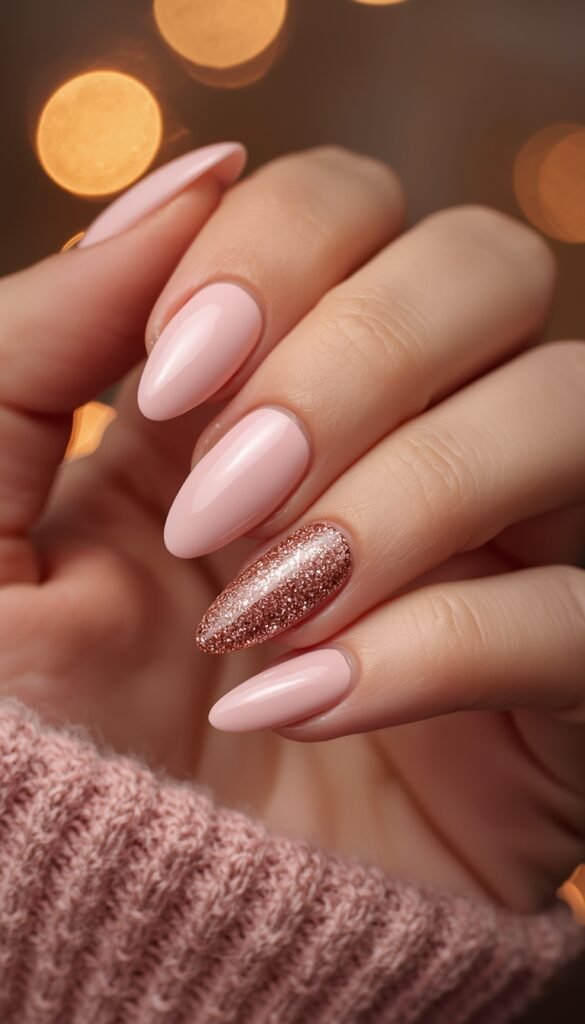
7. Glitter Accent Nails
Because sometimes you just need sparkle in your life.
What you need:
- Sally Hansen Insta-Dri in (Light Pink)
- Rose Gold Glitter Nail Polish
- Loose Nail Glitter Set (Multiple colours including rose gold) (for maximum sparkle)
- Seche Vite Top Coat (you’ll need extra for glitter)
How to do it:
Paint all your nails with your base colour.
On your ring fingers and thumbs (or just ring fingers if you want to be subtle) add glitter.
You can use glitter polish or for maximum impact paint clear polish and dip your nail in loose glitter.
Warning:
Loose glitter is messy. Do this over newspaper or something you don’t care about. I once did this over my good kitchen table and found glitter in weird places for weeks. My husband was not impressed.
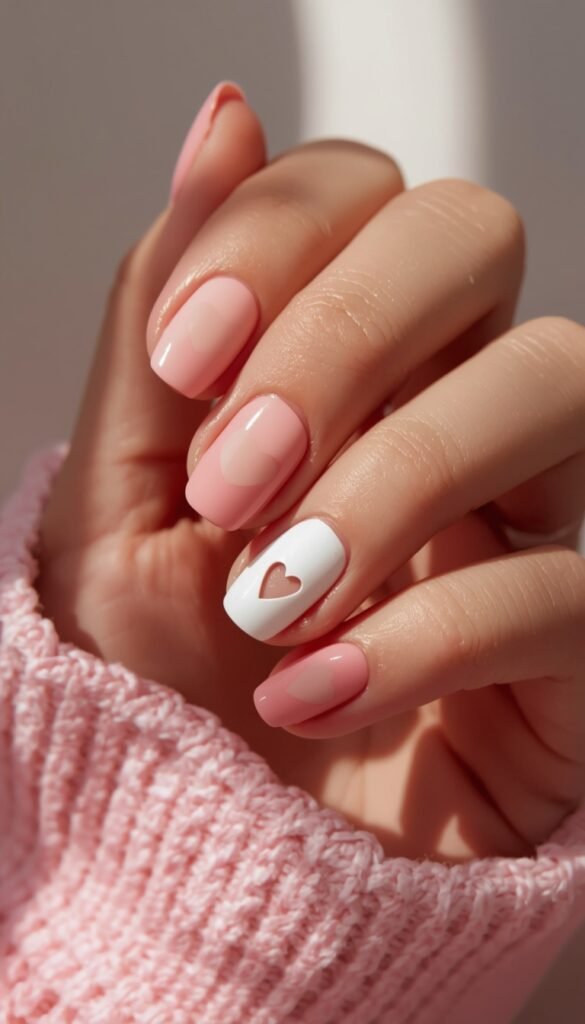
8. Half-Moon Hearts
This one looks way more complicated than it is.
What you need:
How to do it:
Paint your nails with red or pink. Let dry completely (seeing a theme here?).
Stick the reinforcement labels near your cuticles creating a half moon shape.
Paint over them with white or nude polish. Carefully peel off the stickers.
You’ve now got little heart shaped cutouts at the base of your nails.
This is one of those designs that looks really professional but is actually quite forgiving. Even if your polish application isn’t perfect, the heart shape distracts from any wobbles.
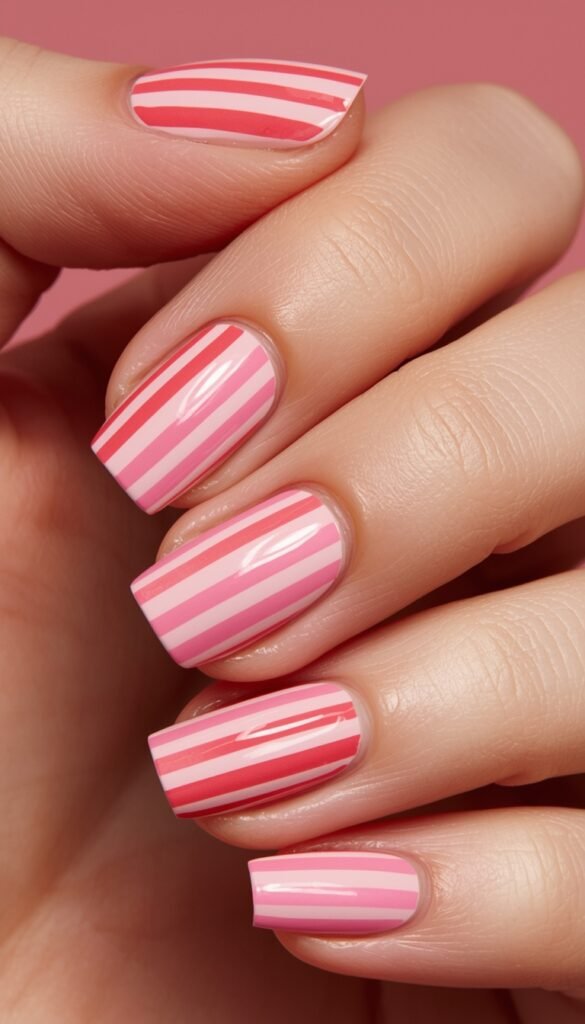
Pink and Red Stripes
Simple but effective.
What you need:
- Essie Pale Pink Nail Polish
- Essie Hot Pink Nail Polish
- Sally Hansen Insta-Dri in “Rapid Red”
- Striping Tape for Nails
- Thin Nail Art Brush (if doing freehand)
- Seche Vite Top Coat
How to do it:
Paint your nails pale pink as a base.
Once dry, add thin vertical stripes alternating between hot pink and red.
You can use a thin brush for this or cheat and use striping tape (which you can get from Amazon for about £3).
I like this one because it’s bold without being too “in your face” about Valentine’s.
It’s got that candy stripe vibe that’s quite fun and retro.
10. Negative Space Hearts
This one’s my current favourite because it’s modern and interesting.
What you need:
- Essie Pale Pink Nail Polish
- Sally Hansen Insta-Dri in “Rapid Red”
- Regular sticky tape or masking tape (from your kitchen drawer)
- Heart-Shaped Nail Stickers/Decals (easier alternative to cutting tape)
- Precision Tweezers
- Seche Vite Top Coat
How to do it:
Stick small heart shapes cut from tape onto your bare nails.
Paint over everything with your chosen colour. Carefully peel off the tape hearts while the polish is still slightly wet. Not too wet or it’ll smudge…not too dry or the tape will take the polish with it. There’s a sweet spot around 2-3 minutes after application).
You’re left with bare nail showing through in heart shapes. It’s quite artistic and minimal, which I’m really into at the moment. Very “I care about aesthetics but in a subtle way.”
The “Special Occasion” Looks
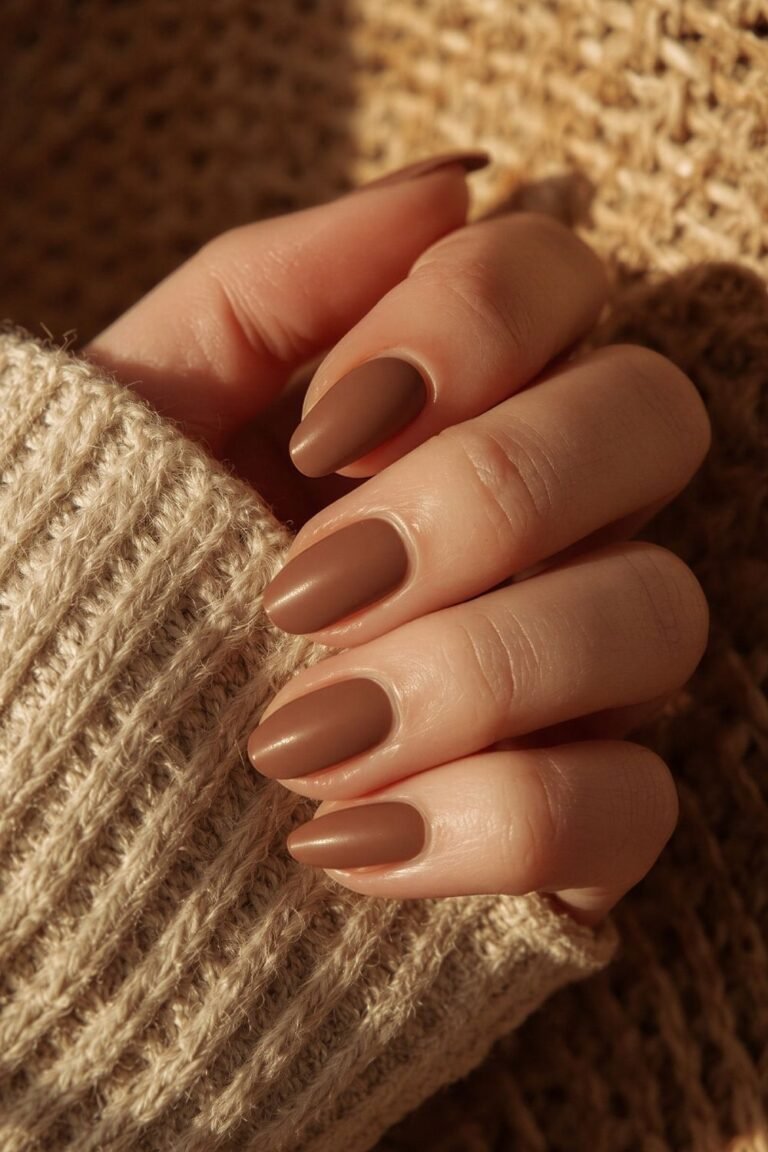
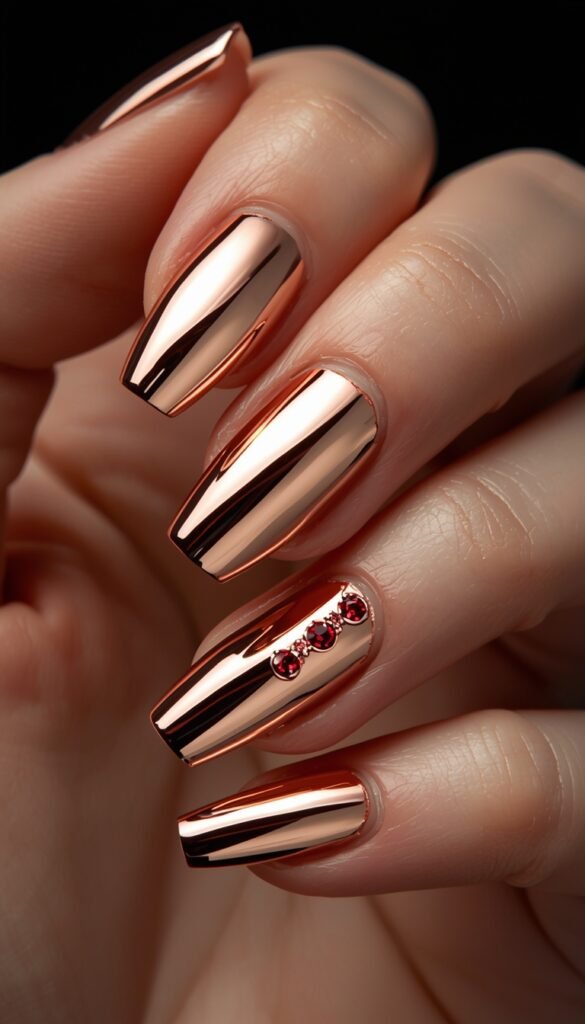
11. Rose Gold Chrome Valentine’s
This is my fancy option that still doesn’t require professional skills.
What you need:
- Essie Nail Polish in Nude/Pale Pink base
- Rose Gold Chrome Powder for Nails
- Makeup Sponge/Eyeshadow Applicator
- Nail Rhinestones & Gems Set (Red & Clear)
- Seche Vite Top Coat
- Nail Art Tweezers
How to do it:
Paint your nails with a pale pink base.
Once completely dry rub rose gold chrome powder onto the nails with a makeup sponge until you get that mirror like finish.
Seal with top coat.
Add a tiny red rhinestone to one or two accent nails if you’re feeling extra.
I did this for my own sort of Valentine’s date night last year (Nando’s and Netflix after the kids were asleep but we made an effort). The chrome catches the light beautifully and looks way more expensive than it is.
Fair warning: Chrome powder gets EVERYWHERE. Do this somewhere you don’t mind cleaning up properly afterwards.
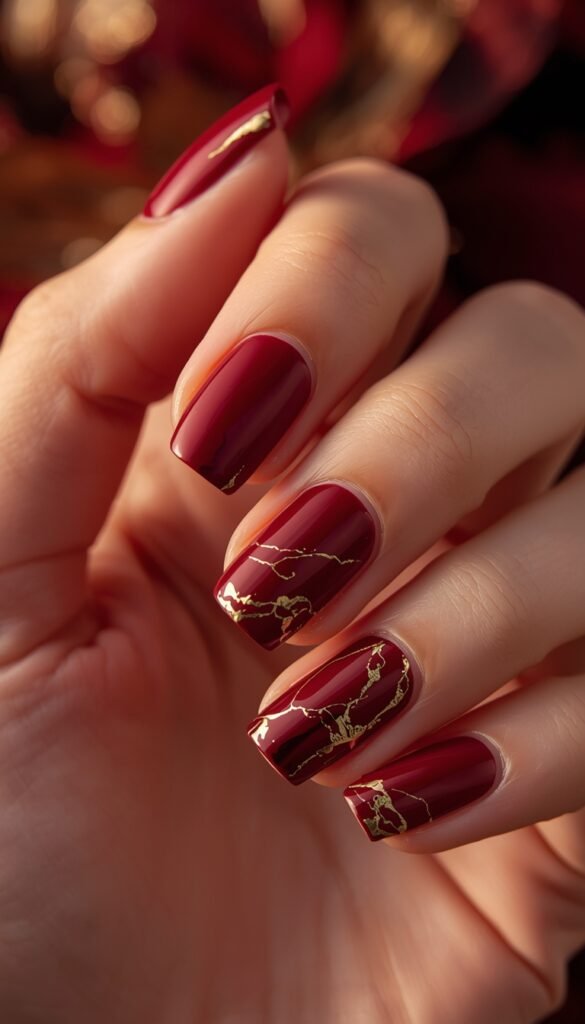
Red Nails with Gold Foil Details
Elegant and romantic without being too Valentine’s-cliché.
What you need:
How to do it:
Paint all your nails red with two coats.
Before the second coat is completely dry, press pieces of gold foil randomly onto the nails.
It creates this gorgeous abstract pattern.
Seal everything with a good top coat.
The randomness is what makes this work…don’t try to be too precise about where you place the foil. The abstract organic look is part of the appeal.
I wore this to a family gathering on Eid and everyone asked about my nails.
My sister immediately wanted me to do hers the same way. It’s one of those looks that photographs really well too.
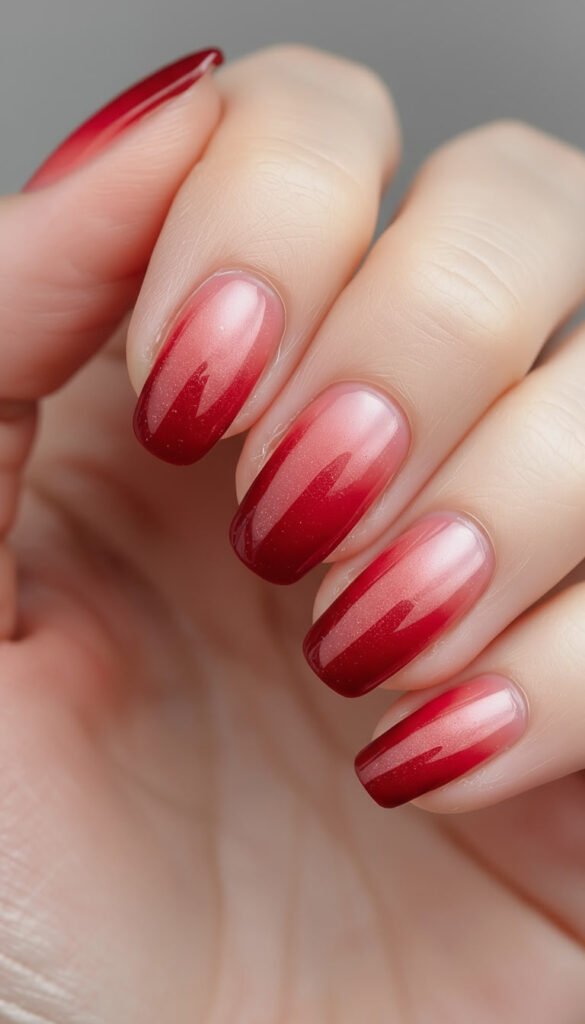
Ombré Pink to Red (The Proper Way)
This is the same technique I mentioned earlier but with more detail for those who want to give it a proper go.
What you need:
- White Base Coat Nail Polish (Opaque)
- OPI Nail Polish Light Pink – Rosy Future
- OPI (Medium Pink)
- Red Essie Nail Polish – Not Red-y For Bed
- Makeup Sponges (Wedge Style)
- Nail Polish Remover (Acetone-Free)
- Cotton Buds/Q-tips (Large Pack)
- Seche Vive Top Coat
How to do it:
Paint your nails white as a base (makes the colours pop).
On a makeup sponge paint horizontal stripes of pale pink, medium pink and red. Dab this onto your nail, working from cuticle to tip.
Rotate the sponge slightly between dabs to blend the colours.
Clean up around your nails with cotton buds dipped in remover.
Apply at least two coats of top coat to smooth everything out.
This takes practice.
My first attempt looked like a crime scene. My second looked better but still messy. By the third time, I had it down. Don’t expect perfection on your first go.
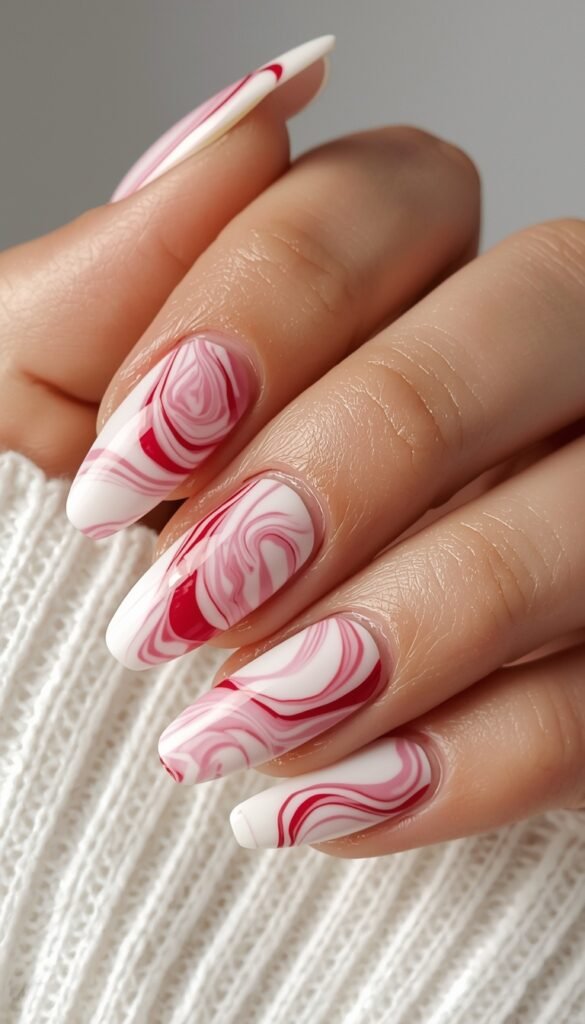
14. Marble Effect with Pink and Red
This one looks absolutely gorgeous and is surprisingly easy once you get the hang of it.
What you need:
- White Base Coat Nail Polish (Opaque)
- OPI (Medium Pink)
- Red Essie Nail Polish – Not Red-y For Bed
- Thin Nail Art Brush (if doing freehand)
- Seche Vive Top Coat
How to do it:
Paint your nails white.
While still wet add small drops of pink and red polish randomly on the nail.
Use a toothpick or thin brush to swirl them together gently creating a marble effect.
Don’t over swirl or it’ll all blend into one muddy colour.
Let it dry, then seal with top coat.
The key is working quickly while everything’s still wet and not overthinking the pattern. Random swirls look more natural and marble like than trying to create a specific design.
15. The Full Valentine’s Gel Manicure
This is for when you’re really treating yourself and you’ve got the equipment.
What you need:
- What you need:
- Essie Gel Couture in Nude
- Red Essie Nail Polish – Not Red-y For Bed
- Thin Nail Art Brush
- Seche Vive Top Coat
How to do it:
Paint your nails Nude.
Let dry completely.
Use the brush to make the patterns as you like or copy the image.
Let it dry, then seal with top coat.
The Mistakes I’ve Made (So You Don’t Have To)
Painting straight onto damaged nails: When I was going through housing issues and nearly homeless with two kids in my 20s, I stress picked my nails constantly. They were wrecked. I thought painting them would somehow fix them. It didn’t. It made them worse. If your nails are damaged focus on healing them first…short, natural, with cuticle oil daily.
Skipping the base coat: Seems like an unnecessary step when you’re rushing, right? Wrong. Red and dark pink polishes will stain your natural nails yellow without a base coat. I learned this the hard way and had yellow nails for weeks.
Not capping the free edge: This means painting the very tip of your nail as well as the surface. I used to skip this step and wonder why my manicures only lasted two days. Capping the edge seals everything in and stops chipping. Never skip it.
Doing my nails right before bed: You think they’re dry. They’re not. You’ll wake up with sheet marks imprinted on them, and it’s absolutely gutting. Wait at least an hour before doing anything hands on, longer if possible.
Cheap top coat: This is the one thing worth spending money on. A good quick dry top coat like Seche Vite (about £8) makes cheap polish look expensive and extends your manicure by days. Cheap top coat makes expensive polish look rubbish and chips immediately.
Budget Breakdown: What Each Look Actually Costs
Because let’s be real, salon gel manicures in London are now £40-50+, which is mental.
Cheapest options (under £10):
- Press-on nails: £3-8
- Simple red manicure with what you already own: £0-4
- Nude with red accent: £0-8
Mid-range (£10-20):
- Chrome nails (if you buy the powder): £12-15
- Glitter designs: £8-15
- Most designs if you’re buying new polish: £10-20
Investment options (£30-50+ initial, but reusable):
- Gel setup (lamp and polishes): £40-60 initially, then polish costs
- Full nail art kit with all the tools: £30-50
My advice? Start with the basics (good top coat, a red, a nude, a pink) and build from there. You don’t need everything at once.
Which Look for Which Occasion?
First date or early relationship: Keep it simple and classic. Red or nude nails, short to medium length, maybe one subtle accent nail. You want to look nice without looking like you’ve obsessed for hours (even if you have).
Long-term relationship/married: Whatever makes YOU happy. My husband genuinely doesn’t notice my nails unless they’re fluorescent or falling off. Do them for yourself not for anyone else.
Galentine’s with your mates: Go bold. Hot pink, glitter, rhinestones…this is your excuse to do the extra thing. My mates and I are planning lunch next week and I’m doing the brightest pink press ons I can find because it’ll make us laugh.
Family gathering: Something elegant that won’t clash with anything. Rose gold chrome, nude with gold foil or classic red are all safe bets.
Just because it’s Tuesday: My favourite reason to do nice nails. No pressure, no occasion, just because you fancy it. Usually something quick and easy…nude polish while watching Netflix.
My Actual Valentine’s Day Plan
Want to know what I’m actually doing this Valentine’s Day? Primark press ons (probably pink or red, haven’t decided yet), applied while watching whatever’s on TV after all four kids are finally asleep. Then probably a quiet takeaway with my husband, definitely not going anywhere fancy because we’re both tired.
And you know what? That’s fine. Perfect, even. The nails will look nice, I’ll feel a bit more put together and I won’t have stressed about creating some elaborate design that I don’t have the time or energy for.
Sometimes good enough is perfect. The £3 press ons make me just as happy as the £45 gel manicure I used to charge clients for. Different context, different priorities.
What Actually Matters
After 16 years in beauty and a year of rediscovering it on my own terms, here’s what I actually think matters:
Your nails should make YOU happy. Not Instagram, not your partner (unless they’re specifically involved in doing them with you, which is quite sweet actually) not the beauty industry telling you what’s “in” this season.
If elaborate nail art makes you happy…brilliant. If bare nails make you happy…equally brilliant. If you’re somewhere in between like me…wanting nice nails but without the pressure of perfection that’s fine too.
Valentine’s Day is just another day.
The commercialisation is ridiculous and honestly most years it falls midweek when everyone’s tired and the kids have school.
But if doing your nails makes you feel a bit special, a bit more put together, a bit like you’ve done something for yourself in a life where you’re constantly doing for everyone else then it’s worth it.
The specific design doesn’t matter. What matters is that moment you look at your hands and think “yeah, that’s nice.” That little boost of confidence, that small act of self-care that’s what it’s about.
Your Turn
I want to know…which of these looks are you trying? Are you team simple and classic or team glittereverything? Have you got any nail disasters to share or tricks I haven’t mentioned?
Drop a comment below and let’s chat. If you’ve got questions about any of these techniques or you want to know about my journey from beauty professional to digital work or honestly anything else, ask away.
Share this with your mates who are always asking for nail inspo or that friend who’s convinced she can’t do her own nails.
Happy Valentine’s Day whether you’re celebrating with a partner, your kids, your mates or just yourself and a good film.
You deserve nice nails and a nice day.
Now, if you’ll excuse me, I need to go break up an argument about the PlayStation and possibly eat the Valentine’s chocolate I’m supposed to be saving.
Priorities.
Related Posts
If you enjoyed this, you’ll love these too: